
 Sign in
| Video: | Setup two-factor authentication in Check Point Connectra with Ozeki NG SMS Gateway (part 1/1, configure your modem) |
With Ozeki's solution for Check Point Connectra you can add
SMS extension to your IT system. In practice it means that Check Point Connectra
includes Dynamic ID which is a new method
for password delivery and makes
a two-factor authentication possible. After you provide your password during the
initial login, the Check Point gateway generates an other one-time password.
This password is sent to a given mobile phone as SMS message with the help of
Ozeki NG SMS Gateway.
This solution makes your IT environment more secure. It also has further
advantages such as the generated passwords expire automatically after they were
used. The administrator can also make settings to improve security. He can
preset the longevity of passwords. Furthermore, it can also be set what should
happen if you or your employees fail to use the generated one-time password.
In this case the
administrator can decide that the system should deny access to resources
partially or completely. He also can set which certain specified options
requiring SMS authentication should be allowed or denied.
If you decide to setup an SMS system in your company you will get a
well-functioning and reliable system as this excellent solution offers a secure
way to handle corporate passwords.
Preconditions
To adopt this solution you will need a connection between the mobile network and your
system. You can establish this connection in two ways: using an Internet connection
or using a wireless connection by attaching a GSM phone or GSM modem to your PC. Please
check this website if you need some help for your decision: Internet based SMS connections
vs. GSM modem based (wireless) SMS connections. According to your decision, you will
different preconditions.
Preconditions for Internet based connection to the Mobile network
To establish the connection between your system and an SMS service provider via the Internet, you will need these devices:
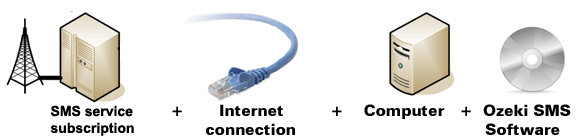
Figure 1/a - Prerequisites for Ozeki NG SMS Gateway IP SMS connection
With this type of connection you will need an SMS service provider
who provides access to its services and ensures Internet based SMS services. On our
webpage we have collected some providers to help you in your decision:
SMPP SMS Service
providers. After you have decided which provider and which service is the most
appropriate for you, you need to sign a contract and you will receive connection
parameters from your provider. Once you got the necessary parameters you can setup
your Ozeki NG SMS Gateway software.
Preconditions for wireless (GSM modem) connection to the Mobile network
With this type of connection all you need is a GSM modem or a GSM phone and you can join it easily to your PC with a data cable. The GSM device will be operated by your Ozeki NG SMS Gateway software and it will be able to handle SMS messaging wirelessly. You will need the following components to use this type of connection:
Figure 1/b - Prerequisites for Ozeki NG SMS Gateway GSM modem connection
For GSM modem connection you will need the following components: |
SIM Card - Available at a local mobile network service provider* |
|
Modem - Use a Wavecom, Siemens or Multitech modem. |
|
Data cable - Comes with the modem |
|
Computer - Recommended: Intel P4 3Ghz, 2GB RAM, 500Mb HDD, Windows OS |
|
Ozeki NG SMS Gateway - Download it from http://www.sms-integration.com |
|
Checkpoint Connectra |
*The SIM card will come with a plan, that will determine how much money you will spend on each SMS.
| Ozeki NG SMS Gateway can be obtained by opening the download page: Download Ozeki NG SMS Gateway! |
System architecture
Ozeki's solution enables your system to send a one-time password
to given mobile devices. These devices can be mobile phones or PDAs. This process
works as follows:
You log into your system with a username and a password. Check Point
Connectra makes a two-factor authentication possible. In practice it means that
Check Point Connectra will generate a One-Time Password. It sends this
generated
password over a HTTP request to Ozeki NG SMS Gateway. The Ozeki gateway will
process it and send an SMS containing this new password to the given mobile
phone (Figure 2).
|
Figure 2 - OTP from Check Point Connectra
Configuration guide for CheckPoint Connectra SMS
If you wish to add SMS functionality to Check Point Connectra please follow the steps of this guide!
Step 1. Configure Connectra gateway
To configure your system you need the Check Point Connectra gateway and an other computer from which you will control this system. First, start the gateway of Connectra and log into the system. If it is the first time you login, log into the console of Connectra with the default username: "admin" and the default password: "admin". First you have to change the password and then the username, as well (Figure 3).
 |
Figure 3 - First login
Then enter expert mode. Type into the console: "expert". You
need to provide your password to be able to enter expert mode. After you enter
it, specify another password to be used to enter expert mode after this time.
By default "vi" text editor is installed on the gateway. To start this
text editor type this into the console: "vi" (Figure 4).
 |
Figure 4 - Expert mode
If it is started you will see the follows (Figure 5):
 |
Figure 5 - Vi text editor
Press "i" to enter insert mode and type the usernames and their phone numbers; and separate them with "space". You can see it in the following syntax:
Name <space> phone number |
Please note that after the <space> part of the inserted
characters only numbers will be processed so please pay attention when you
provide these data (Figure 6). For example:
user1 06301234567
user2 06209876543
user3 06704563219
 |
Figure 6 - Inserted numbers
If you finish, press "backspace" and enter the following values (Figure 7):
:wq! $CVPNDIR/conf/SmsPhones.lst |
With this command you will exit and save data in the following folder: "$CVPNDIR/conf". It will be saved in the following file name: "SmsPhones.lst"
 |
Figure 7 - Create SMS phone file
If you finish, press "Enter". In order to changes come to operation, reboot your gateway. To do so, type in: "reboot" then press "Enter" again (Figure 8).
 |
Figure 8 - Reboot gateway
Check Point Connectra will ask if you really want to reboot. If you press "yes" then rebooting process starts (Figure 9).
 |
Figure 9 - Connectra reboot starts
The following steps will show you how to configure the IP address of the gateway if it is not proper for some reason. In our example the default IP address is 192.168.1.1, and the address will be changed to the following one: 192.168.91.200.
In order to change IP address first type "sysconfig". In this case the system configuration of Connectra starts (Figure 10).
 |
Figure 10 - Sysconfig starts
The first menu is "Network configuration menu". In it, select the forth menu item: "Network Connections" (Figure 11).
 |
Figure 11 - Network Connections
Then in "Network connections configuration menu" select the second menu item: "Configure Connection" (Figure 12).
 |
Figure 12 - Configure a network connection
Select the requested connection (in our example: "eth0"). To configure this connection press "1" (Figure 13).
 |
Figure 13 - Configure ethernet0 connection
The following menu item will change the actual IP address: "Change IP Settings". To do this press "1" (Figure 14).
 |
Figure 14 - Change IP settings
Then you need to provide an IP address and a netmask which is appropriate for this connection. If you finish press "Enter" (Figure 15).
 |
Figure 15 - IP address and netmask
Now close "Settings" menu with the help of "E" and "Q". If you finish, reboot the gateway again, type in "reboot".
Step2. Configure Connectra gateway with "First time configuration wizard"
Then start the operational system and type in the browser: "https://192.168.91.200:4433". Please note that "192.168.91.200" is the changed IP address. "First time configuration wizard" of Connectra automatically starts. On the first page you can read the license agreement. Click on "I accept" (Figure 16).
 |
Figure 16 - License Agreement
Login with your username and password you changed at your first login to Connectra gateway. Click on "Login". After you login the wizard appears again. Click on "Next" (Figure 17).
 |
Figure 17 - Configuration welcome page
On the next page you will find network connections assigned to the gateway. Click on "Next" (Figure 18).
 |
Figure 18 - Network connections
On the next page there is the routing table. You need to define a default route. Click on "New" and "Default route" menu item in it (Figure 19).
 |
Figure 19 - New default route
If you defined a default route, click on "Next". On the next page you need to define a hostname for the gateway. In our example it will be "Connectra" (Figure 20).
 |
Figure 20 - Connectra host name
If you finish, click on "Next". On the next page you can set the date and time. If you do not want to change it, click on "Next" (Figure 21).
 |
Figure 21 - Date configuration
On the next page you can define Web and SSH clients (Figure 22).
 |
Figure 22 - Web and SSH clients
Then you need to select the management type of your gateway: "Locally" or "Centrally" (Figure 23).
 |
Figure 23 - Management type
Then you need to add a GUI client. Namely you need to add the IP address or hostname of the computer from which the gateway will be configured. You can login and configure the gateway only from this computer. If you finish click on "Apply" (Figure 24).
 |
Figure 24 - Add GUI client
Then you can see the added client. Click on "Next" (Figure 25).
 |
Figure 25 - Added GUI client
Now provide the name and password of the administrator (Figure 26).
 |
Figure 26 - Enter Connectra administrator
Next you need to download "SmartConsole" (Figure 27).
 |
Figure 27 - Smart console application
Click on "Download" and install the application. In the end of the installation you will get a notification and on the next page you will get a summary of the gateway's configuration (Figure 28).
 |
Figure 28 - Configuration summary
Click on "Finish". A window appears asking if you really want to continue. Click on "Yes" (Figure 29).
 |
Figure 29 - Configuration process
By clicking "Yes" you start installation. In the end of the installation there is a window which notify you that the installation is complete. Click on "OK" and you can close the gateway (Figure 30).
 |
Figure 30 - Configuration finished
Step3. Final configuration with SmartDashboard
Now start the following application: "SmartDashboard R65". A window appears, type the necessary data in it: provide the administrator's username and password, and the address of "SmartCenter Server": "192.168.91.200". Please note that this is the changed IP address (Figure 31).

|
Figure 31 - SmartDashboard connection
On the next page you need to approve the fingerprint of the SmartCenter Server (Figure 32).
|
Figure 32 -Approve fingerprint
Now the SmartDashboard window appears (Figure 33)
 |
Figure 33 - SmartDashboard
Now you need to provide the users you defined with their telephone numbers at Check Point Connectra Gateway. To do so click on "Users and Authentication/Internal users/Users" (Figure 34).
 > > |
Figure 34 - Users
On the right panel click on "New user" and then "Default" (Figure 35).

|
Figure 35 - Add a default user
In the "Login Name" line provide the username you defined at the gateway previously. Then click on "Authentication" pane (Figure 36).
 |
Figure 36 - Add a username
In the "Authentication" pane select "Check Point Password" in "Authentication Scheme" line. You also need to provide a password which will be used by the defined user (Figure 37).
 |
Figure 37 - User password
Then you can see the provided users (Figure 38).
 |
Figure 38 - Created users
Now click on "Authentication to Connectra" at the Authentication sub-menu (Figure 39).
 |
Figure 39 - Authentication to Connectra
Check the following option: "Challenge users to provide an OTP
received at their mobile device via SMS". Then fill it with the following
data (Note that 192.168.91.250 is the IP address where Ozeki NG SMS Gateway has been
installed):
For SMS Provider URL:
http://192.168.91.250:9501/api?$APIID&username=$USERNAME&password= $PASSWORD&recipient=$PHONE&messagetype=SMS:TEXT&messagedata=$MESSAGE |
Username: admin
Password: abc123
(Please note that this username and password is the default user at Ozeki NG SMS Gateway.)
API ID: action=sendmessage
Please note that you need to enter the connection
strings in one line without line brakes!
Then click on "Advanced" (Figure 40).
 |
Figure 40 - OTP settings
In the first menu item provide how you require the SMS authentication, the length of one-time password, and the validity of this password. You can provide your message data in "SMS Message" part. For example (Figure 41):
Dear $NAME! Your one-time verification code to Connectra is: $CODE |
Please note that "$NAME" holds the username and "$CODE" will be the sent One-Time Password.
 |
Figure 41 - Advanced two factor authentication settings
You can also set other options for this password. If you finish, click on "OK". Then click on "Install" menu item in the "Policy" menu (Figure 42). Note that at least one application and one access to application needs to be defined to do this.
 |
Figure 42 - Install policy
Step 4. Test the system
Now the configuration is complete. To test the system I type in the browser: "https://192.168.91.200". In the appeared window I provide a username and password that have been defined at SmartDashboard and click on "Sign In" (Figure 43).
 |
Figure 43 - Connectra portal
Next you can see that Connectra has sent the One-Time Password and it waits for the user to type it in (Figure 44).
 |
Figure 44 - Verification code sent from Connectra
In Ozeki NG SMS Gateway you can check the sent password (Figure 45).
 |
Figure 45 - Sent message in Ozeki
If this password is typed into Connectra and click on "Submit" then the user can enter Connectra (Figure 46).
 |
Figure 46 - Entered code in Connectra
Thank you for reading this guide about CheckPoint Connectra SMS solution!
Feature list of Ozeki NG SMS Gateway