Convert e-mails to SMS in MS Exchange 2003
On this page you will find detailed information on how to setup an SMS system in your corporate IT environment with the help of Ozeki NG SMS Gateway. Please find step by step setup instructions on how to add SMS functionality to MS Exchange 2003 and how to configure the SMS gateway software for this purpose.
Send SMS from MS Exchange 2003 (part 1/2, configure your modem)
Send SMS from MS Exchange 2003 (part 2/2, configure your system)
SMS technology makes it possible to send your email messages directly to the mobile
phones of the intended people. It means that you can forward your
incoming e-mail messages as SMS text messages to cellphones due to email-to-SMS
functionality. It is also possible to send SMS as e-mail messages
with SMS to e-mail functionality. In this way corporate communication can be
improved in a great extent as availability is ensured. Therefore you can easily
keep contact with your most important customers, business partners, suppliers
or employees even if they are away from the office. This
solution makes it possible to forward your messages in real time even to
multiple recipients.
To realize this function you need to install Ozeki NG SMS Gateway on your
computer. If you decide to implement this solution you will be able to build
a stable, secure and well-functioning IT system with the highest quality.
Checklist for prerequisites
Here is a checklist that enlists the requirements your system
needs to meet. When you start setting up your system, you need to ensure a
connection to the mobile network to be able to send out SMS messages. You can
connect your SMS system to the mobile network by using an Internet connection or you can
setup a wireless connection by attaching a GSM phone/GSM modem to your computer.
The following webpage will help you make a
decision: Internet based SMS connections vs. GSM modem based (wireless) SMS connections.
Internet based connection to the Mobile network
If you wish to connect your system to an SMS service provider over the Internet you need the following components:
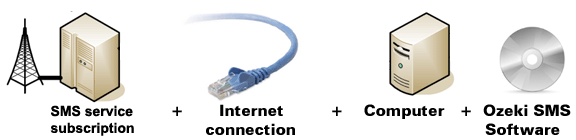
Figure 1/a - IP SMS connection checklist
In order to setup an IP SMS (Internet) connection for
messaging, you need to sign up for the service of an SMS service provider
who can reach the mobile phones in your area. This SMS
service provider should be able to provide SMS service through
the Internet. The following website enlists some of these
provider. Please check it to find such a provider:
SMPP SMS Service providers.
Once you have found the suitable provider and signed up for
their service you will get the connection parameters. You can use these parameters
to configure your Ozeki NG SMS Gateway software.
Wireless (GSM modem) connection to the Mobile network
If you would like to use a GSM device for connecting wirelessly instead of a connection over the Internet, you need a GSM modem or GSM phone that you can attach to your computer with a data cable. In this case your Ozeki NG SMS Gateway software will operate this phone and will send and receive SMS messages wirelessly.
Figure 1/b - GSM modem connection checklist
Your checklist (for GSM modem connection): |
SIM Card - You can get this from your local mobile network operator.* |
|
Modem - Use a Wavecom, Siemens or Multitech modem. |
|
Data cable - Comes with the modem |
|
Computer - Recommended: Intel P4 3Ghz, 2GB RAM, 500Mb HDD, Windows OS |
|
Ozeki NG SMS Gateway - Download it from http://www.sms-integration.com |
|
MS Exchange 2003 |
*The SIM card will come with a plan, that will determine how much money you will spend on each SMS.
|
| Ozeki NG SMS Gateway can be obtained by opening the download page: Download Ozeki NG SMS Gateway! |
SMS sending process from MS Exchange 2003
Once you meet the above checklist you can check how SMS messaging
works. The E-mail to SMS function will work as follows:
If there is an incoming e-mail, it will be forwarded to the user's mail box of MS
Exchange 2003 and to the SMTP server of Ozeki NG SMS Gateway, as well. The
message will be received with an e-mail address in Exchange, for example,
John@ozekisms.org; while the secondary e-mail address contains a phone number
and the IP address of the computer on which Ozeki NG SMS Gateway has been
installed. For example: "+36301234567@192.168.91.150"
In case of SMS to e-mail function, you need an e-mail user interface in
Ozeki NG SMS Gateway but you only need to configure its SMS to e-mail part. The
incoming SMS messages will be forwarded through the SMTP server of MS Exchange
as e-mail messages. Figure 2 demonstrates this process. Ozeki NG SMS Gateway
forwards messages to the mobile network either with a GSM modem attached to the
computer with a data cable or it connects to the SMS center of the mobile
service provider over the Internet.

|
Figure 2 - SMS sending in MS Exchange 2003 with e-mail forwarding using Ozeki NG SMS Gateway
Configuration steps for SMS messaging from MS Exchange 2003
At first you need to install MS Exchange 2003 on your computer. In our example it is on the server called "exchange" (Figure 3).
 |
Figure 3 - Server's name
The server has a fixed IP address which is "192.168.91.156" (Figure 4).
|
Figure 4 - Server's IP address
Now go to "Start" menu and select "Active Directory Users and Computers" console from "Microsoft Exchange" menu (Figure 5).
|
Figure 5 - User's and computer's console
After you have opened "Active Directory", click on "Users" menu item, then right click on the right side of the interface and select "User" menu item from "New" menu (Figure 6).
 |
Figure 6 - New user
In the appeared window provide a username and provide a logon name for this user as well, then click on "Next". In our example it will be "John Smith" (Figure 7).
|
Figure 7 - User's name and logon name
In the next window, make sure that "Create an Exchange mailbox" option is checked. Then provide an email address for the user (Figure 8).
|
Figure 8 - Exchange mailbox name
If it is done, click on "Finish". For a better demonstration I
create an other user with the name of Edward Taylor.
Before you go on with the configuration of the server, make sure that the SMTP
server of Ozeki NG SMS Gateway is enabled. You can enable the built-in SMTP
server if you start Ozeki
NG SMS Gateway on the client computer and select "Server Preferences" menu item
in "Edit" menu. On "Client Connectivity" tab check "Enable the built-in SMTP
server" option. Click on "OK" (Figure 9).
|
Figure 9 - Enable Ozeki NG SMS Gateway built-in SMTP server
Before you return to the configuration of the server, note the IP address of the client computer. In our example it is "192.168.91.150" (Figure 10).
|
Figure 10 - Client's IP address
Now return to the server computer, right click on the right pane and select "Contact" from "New" menu in the "Active Directory Users and Computers" console (Figure 11).
 |
Figure 11 - New contact
First provide a name for this contact object. In our example it is "ozeki SMS contact". Click on "Next" (Figure 12).
 |
Figure 12 - Contact name
Next, click on "Modify" to provide an e-mail address for the contact object (Figure 13).
|
Figure 13 - Modify the email address of the contact
Select the type of the e-mail to be created: "SMTP Address" and click on "OK" (Figure 14).
|
Figure 14 - New SMTP address
On the next page provide the e-mail address in the following way: "recipient@IP address of the target computer". In our example "+36301234567" is the recipient and "192.168.91.150" is the IP address of the target computer (Figure 15).
|
Figure 15 - Contact e-mail address
In the next window you can see the created e-mail address. Click on "Next" (Figure 16).
|
Figure 16 - Created e-mail address
In the end you will find a summary about this process. Click on "Finish" (Figure 17).
|
Figure 17 - Finish the creation of contact
Right click on one of the created user and select "Properties" menu item (Figure 18).
|
Figure 18 - User's properties
In the "Properties" window click on "Exchange General" tab to get the Exchange settings of the user (Figure 19).
|
Figure 19 - General Exchange settings
Click on "Delivery Options" tab on "Exchange General" tab (Figure 20).
|
Figure 20 - Exchange delivery options
Check "Forward to" option and click on "Modify" (Figure 21).
|
Figure 21 - Modify forwarding address
In the appeared "Select recipient" window click on "Advanced" option (Figure 22).
|
Figure 22 - Recipient advanced settings
A search window appears with which you can search in the "Active Directory". Click on "Find now" (Figure 23).
|
Figure 23 - Find recipient
Select the created contact object and click on "OK" (Figure 24).
|
Figure 24 - Select created contact
Then the selected contact object will appear in the "Select Recipient" window. Click on "OK" (Figure 25).
|
Figure 25 - Selected contact object
In "Delivery Options" window enable "Deliver messages to both
forwarding address and mailbox" option and click on "OK".
The configuration of the server is complete. I have created a forwarding address
for John Smith user, then enabled "Deliver both..." option. With this option both
the forwarding and the Exchange e-mail address will receive mails. In this way,
if there is an incoming mail, the user will receive it on his e-mail address and
his cellphone (Figure 26).
|
Figure 26 - Deliver e-mail to addresses
Now on the client computer go to control panel and select "Mail" menu item (Figure 27).
|
Figure 27 - Mail settings
To add a profile to it, click on "Add..." (Figure 28).
 |
Figure 28 - Add mail profile
Provide a name for the profile and click on "OK" (Figure 29).
 |
Figure 29 - Profile name
Select "Add a new e-mail account" option and click on "Next" (Figure 30).
 |
Figure 30 - Add e-mail account
Next select "Microsoft Exchange Server" and click on "Next" (Figure 31).
|
Figure 31 - Exchange e-mail server
In the next window provide the IP address of the server then a username you wish to use, and click on "Check Name" (Figure 32).
|
Figure 32 - Exchange server address and username
If the data have been checked, the server's IP address will turn into the server's full computer name, and the user's logon name will turn into the full name of the user. These will be underlined (Figure 33).
|
Figure 33 - Checked settings
For a better demonstration I create a profile for the other
user, Edward Taylor, on the client computer.
If it is done, close the "Control Panel" and to test the system I start
Microsoft Outlook in "Start" menu (Figure 34).
|
Figure 34 - Start Outlook
Select a profile for login and click on "OK" (Figure 35).
|
Figure 35 - Select profile
After login, click on "New" to send a test message (Figure 36).
 |
Figure 36 - New e-mail
Enter the recipient, in our example it will be Edward Taylor, I write a message and click on "Send" (Figure 37).
|
Figure 37 - Provide recipient and write e-mail
After I log into Outlook with Edward Taylor's profile, you can see the received test message from "john smith" (Figure 38).
 |
Figure 38 - Received e-mail
Now I compose and send a test message for John Smith as well (Figure 39).
|
Figure 39 - New e-mail for John Smith
After I log into Outlook with John Smith's profile you can see the received test message from "edward taylor" (Figure 40).
|
Figure 40 - Received e-mail
There is a secondary e-mail address assigned to John Smith user so MS Exchange Server 2003 has forwarded the message to that address as well. In this way Ozeki NG SMS Gateway has already sent the SMS message (Figure 41).
 |
Figure 41 - Sent SMS
This demonstrated how e-mail to SMS conversion works. Now let's see how SMS to e-mail function works. First you need to add a new user in Ozeki NG SMS Gateway. To do so, click on "Add new user or application" after you log into Ozeki NG SMS Gateway with your username and password (Figure 42).
|
Figure 42 - Add new user in Ozeki NG SMS Gateway
Select "E-mail user interface" user and click on "Install" next to it (Figure 43).
|
Figure 43 - Install e-mail user
Provide a name for this user and click on "OK". Then click on
"SMS to E-mail" tab and enable "Enable SMS to E-mail forwarding" option.
Then provide data relating to the SMTP server in the following way:
Sender e-mail address: this will be the sender of the message. In our
example it is "john@ozekisms.org".
SMTP server: The Ip address of the computer where
Microsoft Exchange Server 2003 is. In our example it is: "192.168.91.156".
If it is done click on "Recipient" tab (Figure 44).
|
Figure 44 - SMTP settings
Provide the recipient's name: e.g. "edward@ozekisms.org" (Figure 45). Now click on "SMTP authentication" tab.
 |
Figure 45 - Recipient settings
As MS Exchange requires authentication, enable the following option: "My SMTP server requires authentication". Then provide the sender's username and password. Click on "OK" (Figure 46).
|
Figure 46 - SMTP authentication settings
Now I will simulate an incoming message via SMPP connection (Figure 47).
 |
Figure 47 - Received SMS
If you take a look at the installed e-mail user's "Events", it can be seen that it has sent the message (Figure 48).
|
Figure 48 - Sent e-mail from Ozeki NG SMS Gateway
After log into Outlook with Edward Taylor's profile, the received SMS can be seen (Figure 49).
|
Figure 49 - Edward Taylor's received e-mail
Thank you for reading this guide about MS Exchange 2003 SMS solution!
If you wish to add SMS extension to your MS Exchange
2003 software, please go to the download page to download Ozeki NG
SMS Gateway >>>